Recording Transactions #1 - Buys & Sells
Transactions can be recorded in any of the four Transaction views - Holdings, Cash, Value on date, or Tax. However, it is suggested that you do so via the Holdings or Cash view - as, in either case, you can see a record of the transaction once entered.
To record a transaction, you need to first select the relevant share in the Portfolio table on the blue side of the screen.
If the share isn't already in your portfolio you will need to add it. For more information about adding shares to a portfolio, please click here.
Note: if you attempt to add a share to a portfolio with Show Current Holdings selected (in the blue Port menu), you will be advised that this has been turned off, allowing you to add the item.

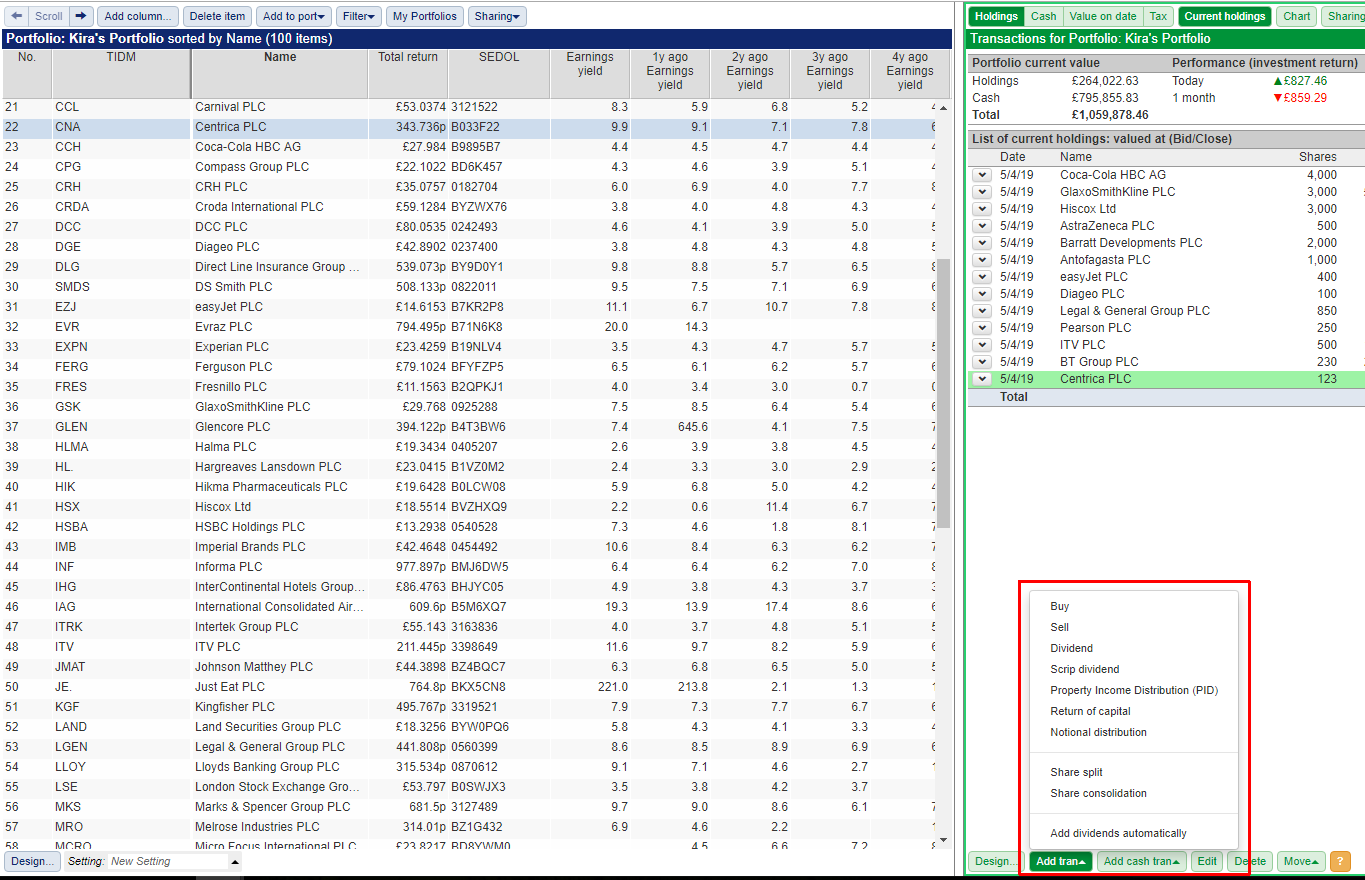
Once you have selected the appropriate share, click on the Add tran button at the bottom-left of the Transactions view. This will invite you to add one of the following transaction types:
- Buy
- Sell
- Dividend
- Scrip Dividend
- Property Income Distribution (PID)
- Return of Capital
- Notional distribution
- Share Split
- Share Consolidation
- Check for dividends

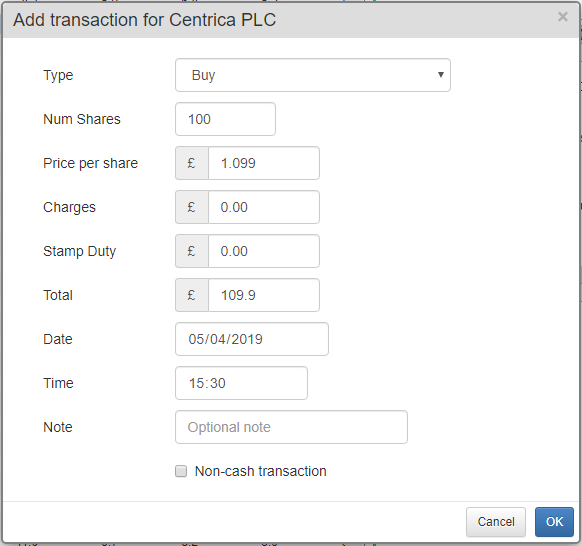
When you click on Buy or Sell, the following Add transaction dialog window will appear. Note that the name of the share is listed at the top of the dialog:

The dialog allows you to set the following values:
- Type - this can be changed between:
- Buy
- Sell
- Dividend
- Scrip Dividend
- Property Income Distribution (PID)
- Return of Capital
- Notional distribution
- Num Shares - number of shares purchased/disposed of
- Price Per Share - this is populated with the most recent close price and is always in the major denomination of the currency the share is traded in.
- Charges - this usually represents your broker charge.
- Stamp duty - this is currently 0.5% on share purchases.
- Total - this is self calculating based on the above 4 entries.
- Date - the date of the transaction
- Time - this only really matters when recording multiple buys and sells on the same day.
- Note - this is an optional note that can be viewed on the holdings screen.
- Non-cash transaction - if you are not intending to keep a record of your cash alongside your transactions then tick this box.
Once a transaction has been recorded it will appear in the Holdings tab (see below). Don't worry if you add a transaction to the wrong share - this can be easily amended by selecting the transaction and using the green Edit or Delete buttons at the bottom of the window.

If you do not have sufficient cash credit to cover the transaction then the program will display the following warning.

in the Cash view, the negative balance will be highlighted in red.
This can be rectified by adding a credit prior to the date and/or time that you recorded your purchase. For more information about cash accounts, please click here.

Sell transactions operate in a similar fashion to Buy transactions. Note if you record a sale of shares where there is no previous purchase or you attempt to sell more shares than you have previous recorded purchase/s for then the transaction will appear in red on the Holdings screen.
In the example below, 101 shares have been sold when the figure should have been 100:

To edit an incorrect transaction, select the transaction (so that it is highlighted in green), and click on the Edit button at the bottom of the Transactions view.

Note: If you select the Summary line at the top of the expanded position, or the Latest line at the bottom of the expanded position, and click Edit, the position will be collapsed or expanded.

To delete a transaction, simply select it and click on the Delete button.
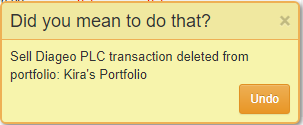
When you delete a transaction, SharePad will ask if you wished to do so and give you the opportunity to Undo what you have just done.
